
Setting up Nikon Wireless Transmitter Utility
I have had a number of questions regarding setting up the Nikon Z6, Z7 and Z9 series cameras to wirelessly tether to a computer for file transfer. This post provides step by step instructions for how to get these cameras connected using Nikon’s Wireless Transmitter Utility (WTU). For this walkthrough I have used a Nikon Z9 and Apple MacBook Pro. Steps will be similar for other Z cameras and for Microsoft Windows based computers.
WTU Tethering
First off you need to be next to the computer you want to tether to with the camera to hand as the connection process requires access to both devices.
If not already done so, download the Nikon Wireless Transmitter Utility (WTU) onto the computer and install it. The program can be downloaded directly from Nikon at https://downloadcenter.nikonimglib.com/en/products/168/Wireless_Transmitter_Utility.html.
Once installed exit the program.
There are two modes that you can use, access point where the camera sets up an ad-hoc WiFi network for you computer to connect to, and infrastructure where the camera connects as a client on a home or work network router. The camera can be set up for both so you can choose which one you want at a later date.
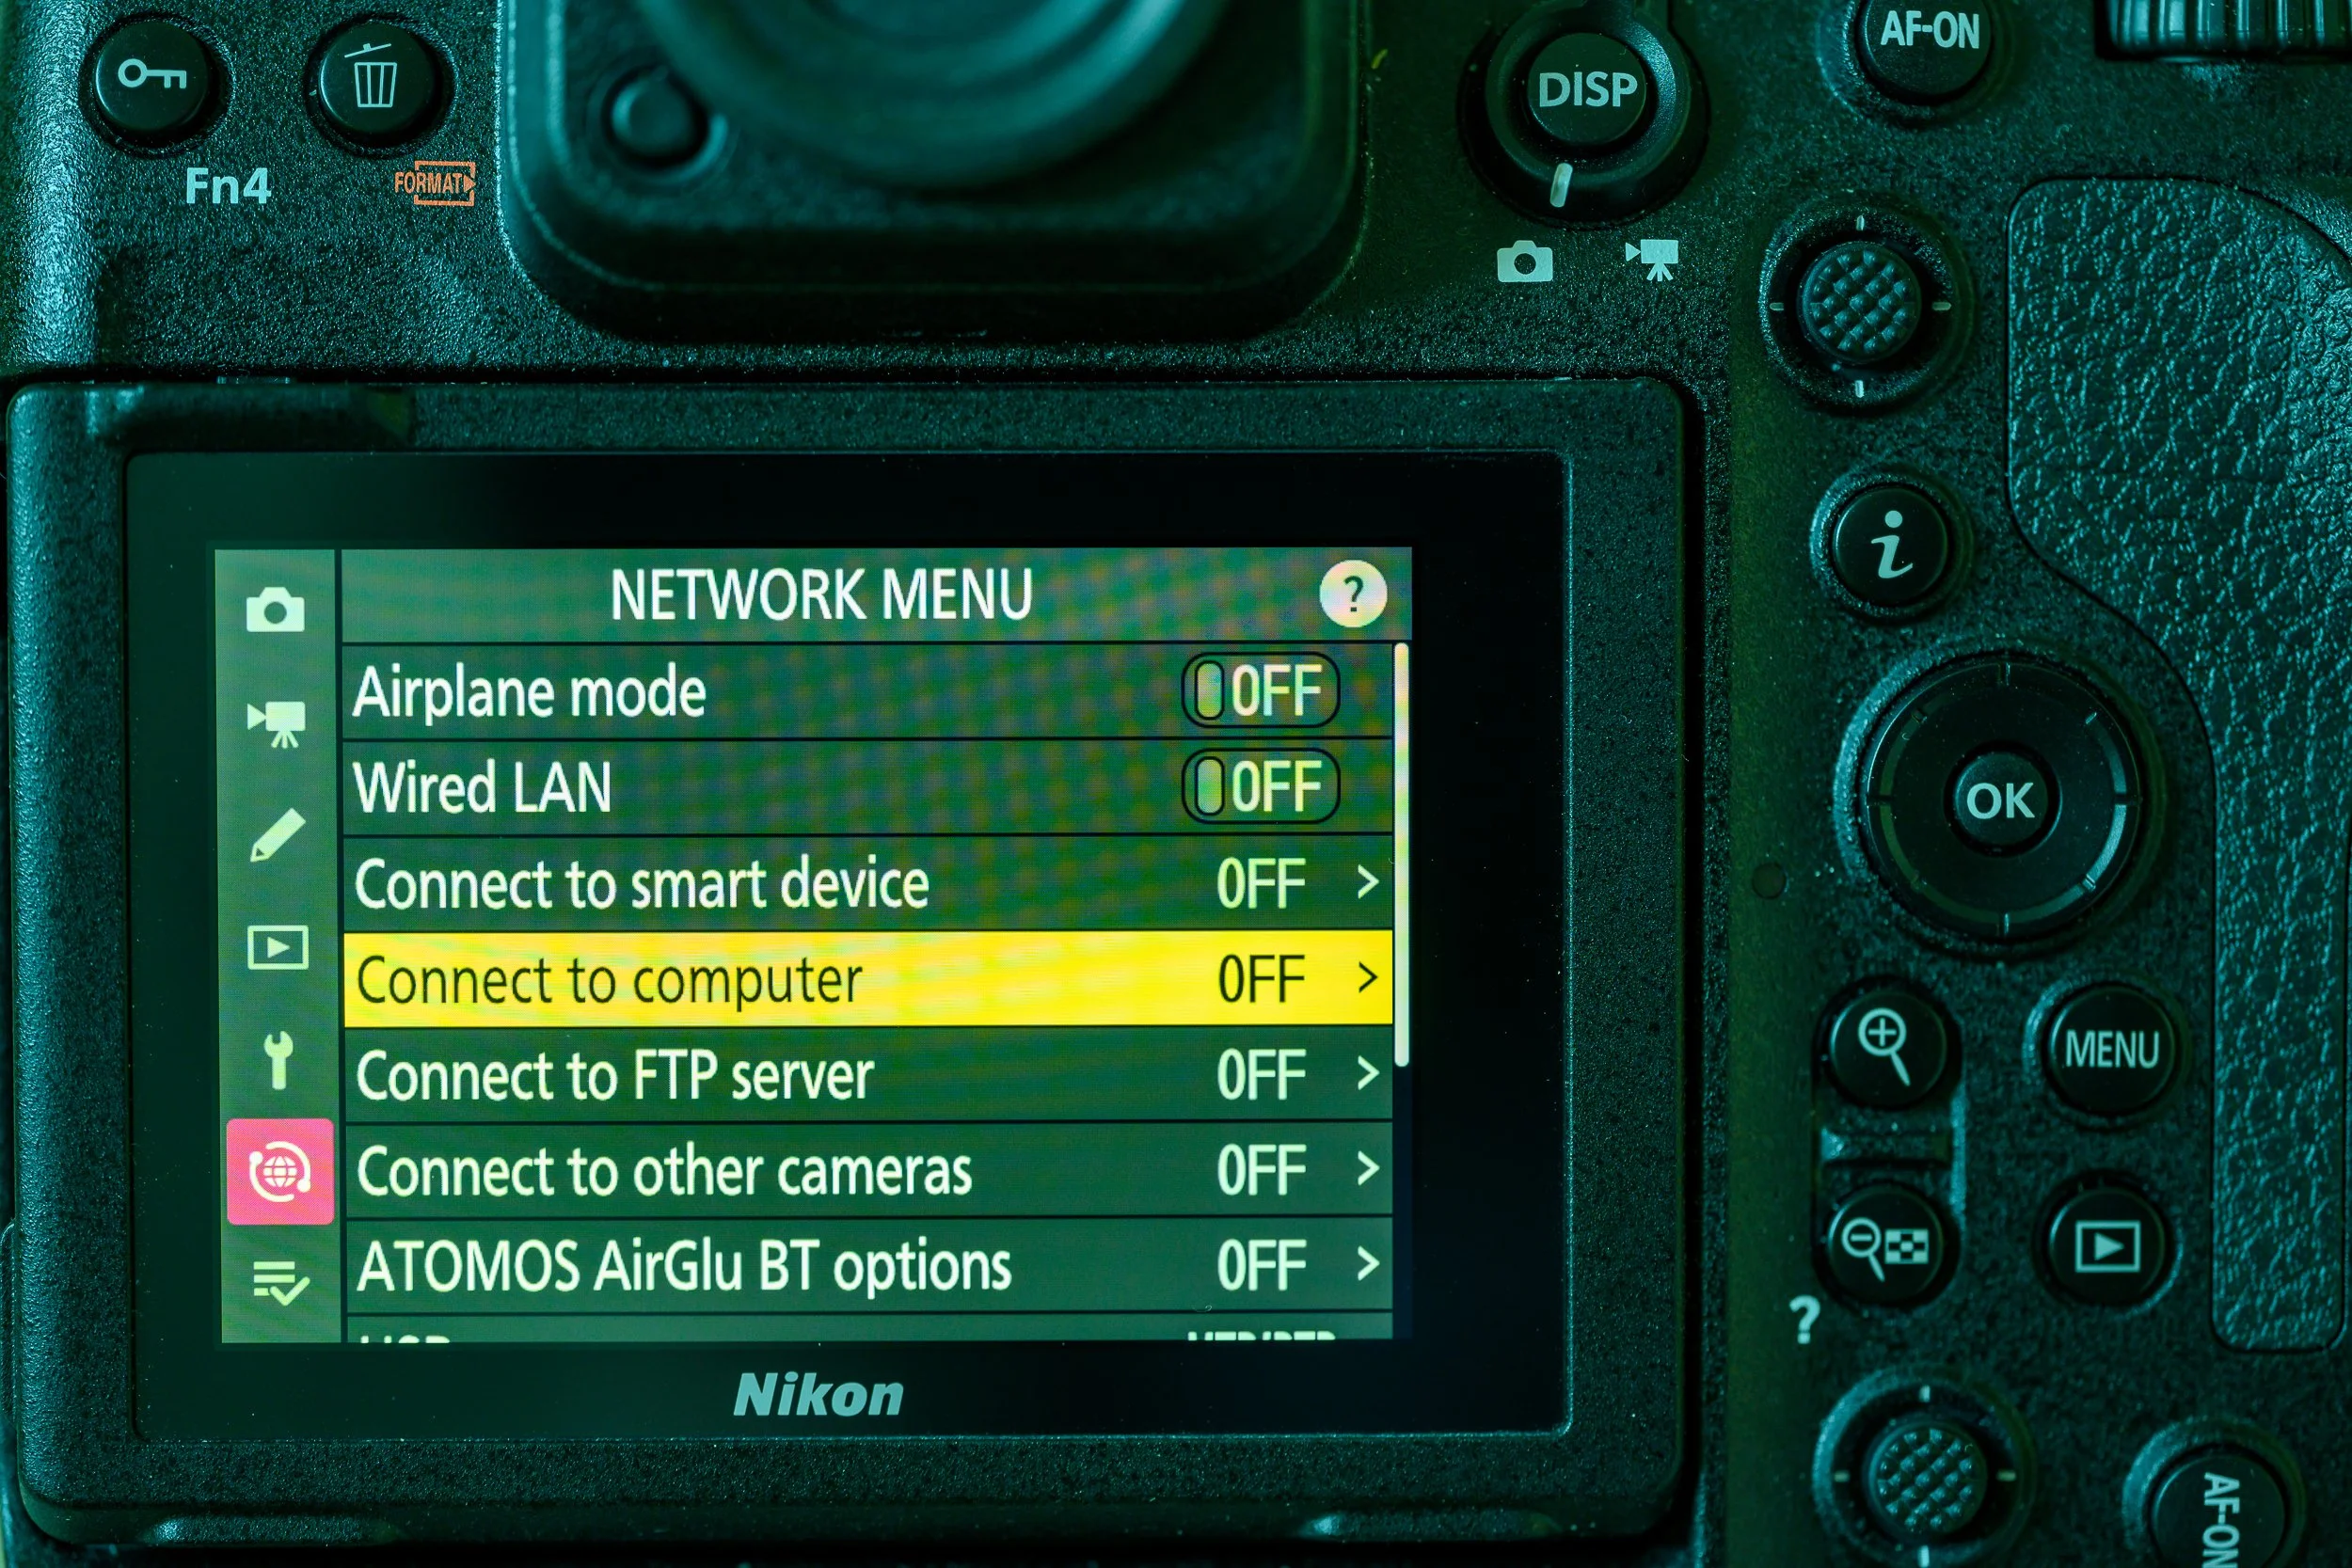
Access Point Mode
On the Z9 go to menu and step down to the Network menu. (On other Z cameras this option is likely to be found in the Setup menu).

Select Connect to Computer
In the submenu that opens go to Network Settings

Go to Create Profile and select

Enter a name for the new profile e.g. WLAN1 and press okay

The Connection Wizard should start. Select Direct Connection to Computer and press OK

The Z9 will display a box providing details of its Wi-Fi network SSID and password key.

On your computer select Connect to WiFi and allow the computer to search for new networks. Find the network with the same name as that displayed on the camera and click on join. This may disconnect you from the internet.
Once the computer has joined the network go back to the camera. The screen should display the pairing window and ask you to start the WTU program

Start WTU. The program will start the pairing process.

Click on the camera identified in the WTU wizard and press next.

The camera should now display an Auth Code. Enter this into the WTU and the Pairing Complete screen should be shown on the camera and computer. Press Next


Press OK on the camera.
The WTU should now display a screen asking for you to select the destination directory. Browse to where you want the photos to be stored and press next.

The Action Completed Successfully screen should be shown. Press Next.

A screen will be displayed reminding you to check the network connection before transferring images. Press close.

The camera should display the connecting to Network screen and then Connecting to Computer.
At this stage relaunch WTU and leave the window open.
The camera should now connect to the computer and show the WLAN1 profile highlighted in green.

Go to Connection Type and select Picture Transfer


Go to Options and select the options you require, e.g. Auto upload, etc.


Each time you take a photo it will be automatically uploaded to the computer.
If you don’t want to upload all photos as they are taken turn Auto load off. You can select individual photos to upload by pressing the Play button, navigating to the required photo and the pressing the I menu and choosing Select for upload to computer.

Infrastructure Mode
On the Z9 got to menu and step down to the Network menu.
Select Connect to Computer
In the submenu that opens go to Network Settings
Go to Create Profile and select
Enter a name for the network profile, e.g. WLAN1 and press OK
Click on Search for WiFi Network

The camera will display searching and then a list of discovered WiFi networks. Select the relevant network and press Next


Enter the password for the selected network and press OK (magnifying glass)

The camera will briefly display the network SSID and then the Choose how the IP address is obtained window


Select Obtain Automatically and press OK
The camera will display the allocated IP address and Mask details. Press OK.

The camera will then display the pairing computer and camera wizard and ask you to start the WTU.
Run WTU and select the camera on the pairing screen and press next
The camera will display an authorisation code.
Enter this code in the screen in WTU and the Pairing Complete screen will be displayed.
Click next and WTU will ask for the destination directory for transferred images.
Enter the directory details and press next. The Action Successfully Completed screen should be shown.
Click next and the check network connection reminder screen will be shown
Click Close
On the camera press OK to close the pairing dialog
The camera will show the network details screen and start connecting to the network. Run the WTU if it is not already running.
When connected the WLAN1 indicator will turn green.


Go to Connection Type and select Picture Transfer
Go to Options and select the options you require, e.g. Auto upload, etc.
Each time you take a photo it will automatically be transferred to the selected directory on the computer. If you look at the network menu after taking a photo it will show the upload progress

If you don’t want all photos to transfer automatically then turn auto upload off.
You can select individual photos to upload by pressing the Play button, navigating to the required photo and the pressing the I menu and choosing Select for upload to computer.
Hopefully you camera and computer are now connected and photos being transferred over Wi-Fi from the camera to you selected destination folder on your computer.
Next time you wish to use the transfer all you need to do is go to the Network menu, select Connect to computer, Choose Network settings and then scroll to the profile you have created, e.g. WLAN1 in this walkthrough. and press OK. As long as WTU is running the camera will then connect to the computer and start transferring your images.
You can create and store multiple profiles in this manner and then select the appropriate one as you need it. For example, I have profiles set up for the following:
iMac - set up so that the camera connects to my home network router and then copies all images automatically to my iMac in my home office. This means I can use the computer anywhere within my home or garden and the images will save directly to the iMac
MacBook - set up so that the camera connects to my home network router and then copies all images automatically to my MacBook laptop. This means I can use the computer anywhere within my home or garden and the images will save directly to the MacBook in the house
MacBook AP - set so that I can transfer images from the camera to my laptop without connecting to my home network, e.g. when out and about, clients offices, etc.
I also set up specific profiles if I need to connect to a client’s network and have access to their Wi-Fi router.
Once the tethering function is working you can set up your image management program to watch the destination folder and automatically import them. Lightroom has Auto Import, Capture One has hot Folders and Photo Mechanic has Live ingest, for example