What’s in my Bag ?
While the weather in the UK is bad I thought I would provide a quick update of what equipment I am currently using for my photography. Here is a breakdown of what is currently in my camera bag for Landscape and Nature Photography, and a brief explanation of why it's my go-to setup.
Camera Bodies
I have been a Nikon user for many years. I started off with a Praktica MTL3 and then swapped it for a Pentax P30N. When Nikon released the F80 in January 2000 I immediately jumped ship and bought it as part of a twin lens kit with the 28-80 and 70-300mm zoom lenses. Since that point I have been converted to Nikon and never found a reason to change.
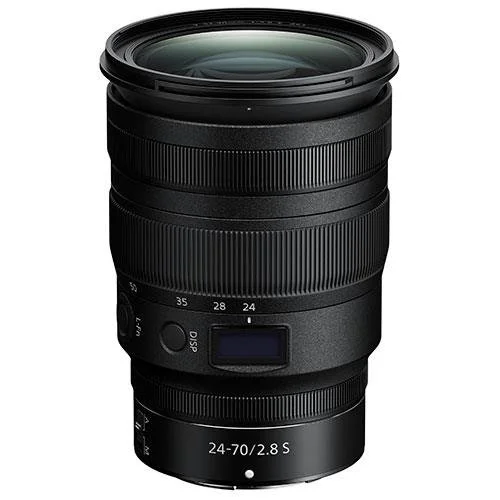
My journey with Nikons took me from the F80 to an F100, then through the D70, D100, D200, D300, D700, D500, D810, D850 and eventually the D5 DSLR camera bodies. While I was recovering from surgery I had to restrict the amount of weight I was lifting so looked for something lighter than my DSLRs and decided to try the newly released Nikon Z6 (it was only 3 months old when I had surgery) and Nikkor Z 24-70 f4 S kit lens. Up until this point I had been firmly in the DSLR camp and had the opinion that mirrorless cameras were a gimmick and would never replace the DSLR for “proper” photographers.
Anyway, to cut a long story short, the Z6 completely blew me away. I was amazed by how the camera handled, the quality of the images, responsiveness of the electronic viewfinder and the size and weight of the camera. The kit lens was pin sharp, not like the kit lenses when I started out. The EVF was massively improved over the EVF in my Nikon P900 bridge camera which made me feel sea-sick every time I zoomed in or out. All in all, my opinion of mirrorless cameras as a fad changed almost overnight.
The only thing that niggled me was the drop from 45MP in my D850 to the 24MP in the Z6. Previously, I always had to choose whether to take the D850 or D5 when going shooting - did I want high resolution or high performance. Even though the D5 was the superior camera I would take the D850 at least 90% of the time. The temporary restriction on not using my DSLRs meant that I didn’t have to make the choice, but I soon missed the detail from the high resolution sensor. When the Z7ii was released in late 2020 I decided to switch from the Z6. The quality of the images was identical to those from my D850 and I found the camera to be much better to use.
Step forward another year to the release of the Nikon Z9 in December 2021 and Nikon finally released a mirrorless camera that could replace my D5. I made the decision to trade in all of my DSLR bodies (including those consigned into various drawers and cupboards for long term storage) and purchase the Z9 and a collection of Z-mount lenses. I now have the choice of do I want to take a lightweight camera or do I need the performance of the Z9? I no longer have to sacrifice image quality in favour of performance since both cameras feature stunning 45.7MP sensors. More recently I have also added a Z8 for walking where I am likely to need faster and more reliable AF than the Z7ii offers.
For landscapes I mainly tend to use the Z7ii. Its small size and weight make carrying it easy. Similarly, for macro work you can get closer to the subject with a small unobtrusive camera where the much larger and imposing Z9 would be more of an issue. For wildlife shots though the Z9 is the go to camera.
Lenses
As I have previously mentioned I have made the transition from DSLR to mirrorless and swapped out most of my f-mount lenses for their Z-mount equivalent. Nikon’s S line lenses are renown as being at the top of the line-up of NIKKOR Z lenses and were developed by Nikon engineers aiming at the very highest levels of optical performance. The large mount opening and the much shorter flange distance between the mount and the sensor allowed Nikon to develop new optical designs and construction that provide enhanced performance when compared to the previous f-mount versions. This also allowed the lenses to be smaller and lighter, and when fitted with new AF motor systems gave aa truly silent autofocus system.
I have selected the f/2.8 versions of most of these lenses due to their incredible performance even when used wide open. There is just something special about the f/2.8 lenses that you can’t achieve with the smaller and cheaper f/4 versions.
The only remaining f-mount lens I have kept is the AF-S 500 f/5.6 PF. This is a fantastic ultra-telephoto prime that is still one of my favourite lenses for wildlife. It is remarkably small and lightweight and makes an easily handholdable setup, even with my weight restrictions. I’m sure other options like the Z600 f/6.3 PF are just as good or even better that the f-mount 500 PF, but the cost to upgrade is significant and not something I am currently considering. Since selling my DSLRs this lens is permanently fitted my FTZ adapter.
I still use the Nikon TC-14Eiii and TC-20Eiii teleconverters with the 500PF to achieve 700mm f/8 and 1000mm f/11 combinations. Unlike with DSLRs these lens and TC combinations retain full autofocus operations on my Z7ii and Z9 with little degradation in image quality.
You may have noticed that I still use the original FTZ adapter with the tripod mount. Although I have relatively large hands I don’t find it restricting or uncomfortable when mounting it on the Z9. It does come in handy for high magnification macro work though as I can mount my f-mount bellows equipment to the FTZ adapter and use the Kirk FTZ l-bracket to provide additional support, removing any flexing in the bellows setup.
Accessories
I kept my SB800 and SB900 Speedlights and R1C1 Macro flash kit as they are fully compatible with Nikon’s Z cameras. The only minor restriction is that you have to use the flashgun menu to set them up as the in-camera menu system doesn’t work with these older flashes. It’s not something I miss since it’s the same as using DSLRs. Remembering to turn off and on “Apply settings to Live View” is the only additional step in using them on the Z7ii (the Z9 has a menu option to do this automatically).
Bags and Cases
Camera storage and transportation is a big concern when you have a large collection of equipment and over the years I have tried many different models of camera bag. My current preferred systems are the Think Tank Airport range. I have an Airport Security V2 that holds all of my main camera equipment including both bodies, all my lenses and various accessories including batteries, memory cards, cables and my MacBook Pro laptop. I also have a smaller Airport Navigator that generally holds my flashes, chargers, and a range of other items. This bag can easily be repurposed though to become my main case for travelling lighter.
For every day shooting, when I don’t need to take both cameras and the full range of lenses, I use a much lighter LowePro Mini Trekker AW backpack. I have used this bag for almost 15 years and it still looks like new. It is ideal for loading into the back seat of the car so I can quickly get access to the camera should I need to.
Tripods, Heads and Brackets
Tripods and heads are some of the most important items for getting truly sharp images. My Induro Grand Stealth 404 XL Series 4 carbon fibre tripod is by far one of the best investments I have ever made to help improve my photography. It is tall enough to be eye-level on a hillside, completely solid in high winds and build-quality is phenomenal, easily comparable to the equivalent but much more expensive Gitzo system. It opens to a height of almost 2m without the head and can take a weight of 30kg yet it weighs only 2.7kg. I also have an older Manfrotto 055 Pro for when I need a smaller tripod (but interestingly it is almost the same weight as my Induro).
I have a range of heads, depending on my particular use at the time, including a ball head, gimbal head for long lenses and, my current favourite, a video fluid head. These can all be combined with a Leofoto levelling base that makes setting up and levelling the tripod so much quicker and easier compared to adjusting the individual legs, especially on uneven ground or hillsides. This makes shooting panoramas so much more pleasant.
Both my cameras are fitted with l-brackets to make switching between landscape and portrait orientations so much easier. This also has one major benefit over tilting a ball head in that the weight of the camera remains over the centre of the tripod for maximum stability rather than being offset to one side. I also have a Kirk FTZ l-bracket - I used this with my f-mount lenses that didn’t have lens feet, but as I’ve mostly changed to z-mount lenses now this gets very little use.
Miscellaneous
I started using graduated filters for the first few years of my photography but soon realised that masking and bracketing in Lightroom and Photoshop can achieve similar results with less hassle than filters and filter systems, I now only use Kase Wolverine Magnetic Circular Neutral Density and Circular Polarising filters, The first reason is space - they are less than ½ of the size of my old grad filters which means less weight in my bag and more room for lenses. Secondly, they simply snap on and off the lens when you want to use them. You can stack a polariser and multiple different strength ND filters together. I use the maximum size 112mm filters Kase supply for compatibility with my Nikkor Z 14-24 f/2.8 S wide angle lens.
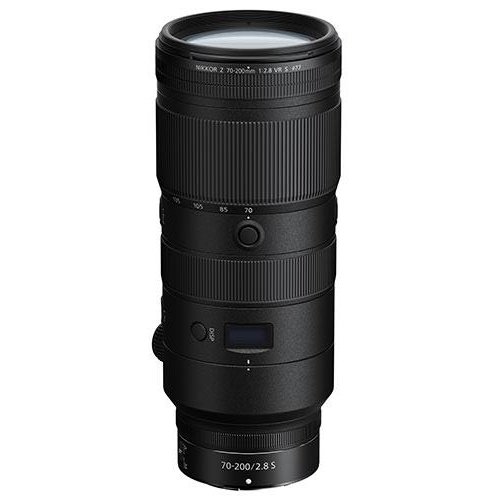
One surprising benefit of this larger kit is the ease of use with more than one lens. The large HB-97 lens hood that comes with the 14-24 lens has a 112mm screw thread to take the Kase 112mm low profile magnetic adaptor so that the filters can simply be clipped on inside the lens hood. This hood also fits onto the Z 24-70 f/2.8S and the Z 70-200 f/2.8 S lenses even though they have 82mm and 77mm filter threads respectively. This means I can use the HB-97 hood almost like a simple filter system. I can also use the 112mm filters with my Z 100-400 f4.5-5.6 VR S lens using a 77mm-112mm magnetic adapter ring and my AF-S 500PF using a 95mm-112mm adapter.
The best thing about these filters though is that they were free - I won the set as first prize in a Kase Photography competition at the Photography and Video Show. I was going to buy them anyway, but winning them made their acquisition so much sweeter !
For carrying my cameras I love the Black Rapid Breathe sling strap. It makes the cameras feel so much lighter and more comfortable than having straps around your neck. I also have the Breathe Dual sling straps for when I need to carry both cameras with lenses attached. I started using this for wedding photography using a 24-70mm lens on one camera and 70-200mm lens on a second. I have modified the straps to include a Kirk QRC-1 mini arca swiss clamp so I can quickly attach them to my camera l-bracket or the lens feet on heavier lenses.
Other Stuff
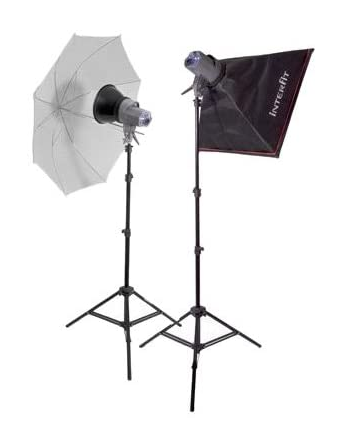
In addition to my general photography equipment listed above, I also use a mixture of Bowens Gemini and Interfit Studio Flash kits for portrait or product photography. These don’t tend to get much day to day use but have been necessary for past studio or location based sessions. I also have a number of Kate Backdrops pop-up backgrounds for use when necessary.
I’m also keen on macro photography and in addition to my Nikkor Z MC 105 f/2.8 VR S macro lens I have an ancient Nikon PB-4 bellows and a couple of sets of Nikon PB-6 bellows from the 1970 - 80’s for when I need more magnification. I got these cheaply from e-Bay (less than £100 for all three sets) but they are still in mint condition. I use the bellows with a Cognisys StackShot computerised macro rail to provide automated focus stacking. My most used lens with this equipment in the EL-Nikkor 50mm f2.8 enlarger lens (shown below).
Nikon Z7ii with Nikon PB-6 Bellows and EL-Nikkor 50mm f/2.8 enlarger lens on a Cognisys StackShot Macro rail
Processing
I made the switch from Windows PCs to Apple Macs in 2008 and haven’t looked back since then. My main editing computer consists of a 2017 iMac 5k 27” computer which is currently connected to a headless 2023 M2 Max Mac Studio via Thunderbolt. The display screen on the iMac is superb for editing photos and video and while the computer is still able to plough through most tasks I throw at it, it can struggle with some of the latest AI functions like Denoise. This is where the M2 Max Mac Studio excels however, its 12 CPU core M2 Max chip with 38 core GPU and 16 core neural engine makes light work of denoising the 45MP images from my Nikon cameras.
Apple 2017 iMac 5k 27” and M2 Max Mac Studio
For example, on the iMac, denoising each 45MP image file can take over 3 minutes, on the Studio the same file takes approximately 15 seconds. What I tend to do is batch process all of my files through DXO PureRaw 4 denoising software on the Studio allowing me to perform basic Lightroom edits on the iMac without any risk of either computer slowing down.
For my workflow I start off with Photo Mechanic on the iMac to sort, cull and keyword my images. The images I want to keep are then sent to the Mac Studio (drag and drop into a shared folder) and then I use Screen Sharing to start processing them using DXO PureRaw 4. This applies geometric and lens sharpness corrections and any noise reduction necessary, even on low ISO files. This works as a batch process and requires no manual input. As the images are processed they are written back to the shared folder so I am able to access them from the iMac. These images are then reloaded into Photo Mechanic for a second review where I identify those I was to load into Lightroom for further processing and possible editing in Photoshop.
All my images are stored on a four bay Synology DS918+ network attached storage (NAS) device. As Lightroom generally uses previews when editing images it doesn’t matter whether the original image files are stored on a local SSD or a slower NAS. Once imported the original files are only used for exporting and printing. My Synology NAS automatically backs up to a Western Digital PR4100 NAS each night. I deliberately chose a different manufacturer for my backup NAS so it would be unlikely for both to fail at the same time say, for example, a problematic firmware update was pushed out to one the other wouldn’t be affected. The NAS also backs up to Synology C2 online cloud backup service.
I hope this has been of interest to you - if you have any thoughts please leave a comment below.


